
There is something innately lovable about making fermented foods from scratch. For starters, they are that ‘Mr Cool’ that sit by the quiet corner in your kitchen, being the prideful symbol for ‘doing it for yourself’, sticking two fingers at commercialism. And secondly, they become the ‘My Baby Project‘ since something like miso has to be nurtured over a very-very long period of time. Note, the apt word here is ‘baby’ and ‘nurture’, because “The thing is ALIVE!!!” (think B-movie with some-kinda green lagoon here), with microorganisms such as yeast and good bacteria thriving in it. They are the busy bees working their socks off to make it tasty. What’s more, what’s not to love about a ‘baby’ that’s not one for needy attention? Fermented foods like to be left alone, rather, they’d prefer to quite happily take care of themselves, working it’s fermentation-magic in their own sweet time. (Don’t laugh, because it’s silly I know, but as they are live things, I call my miso ‘my baby’, and name my sourdough starter ‘Jessica’. My rice-bran pickle-bed ‘nukazuke’ is simply and affectionately called ‘Nuka-chan’.)
Anyway, Let’s cut the malarkey. You’re here for the recipe. It’s below. And It’s pretty long. I tried to cover everything I know about it. Sorry.
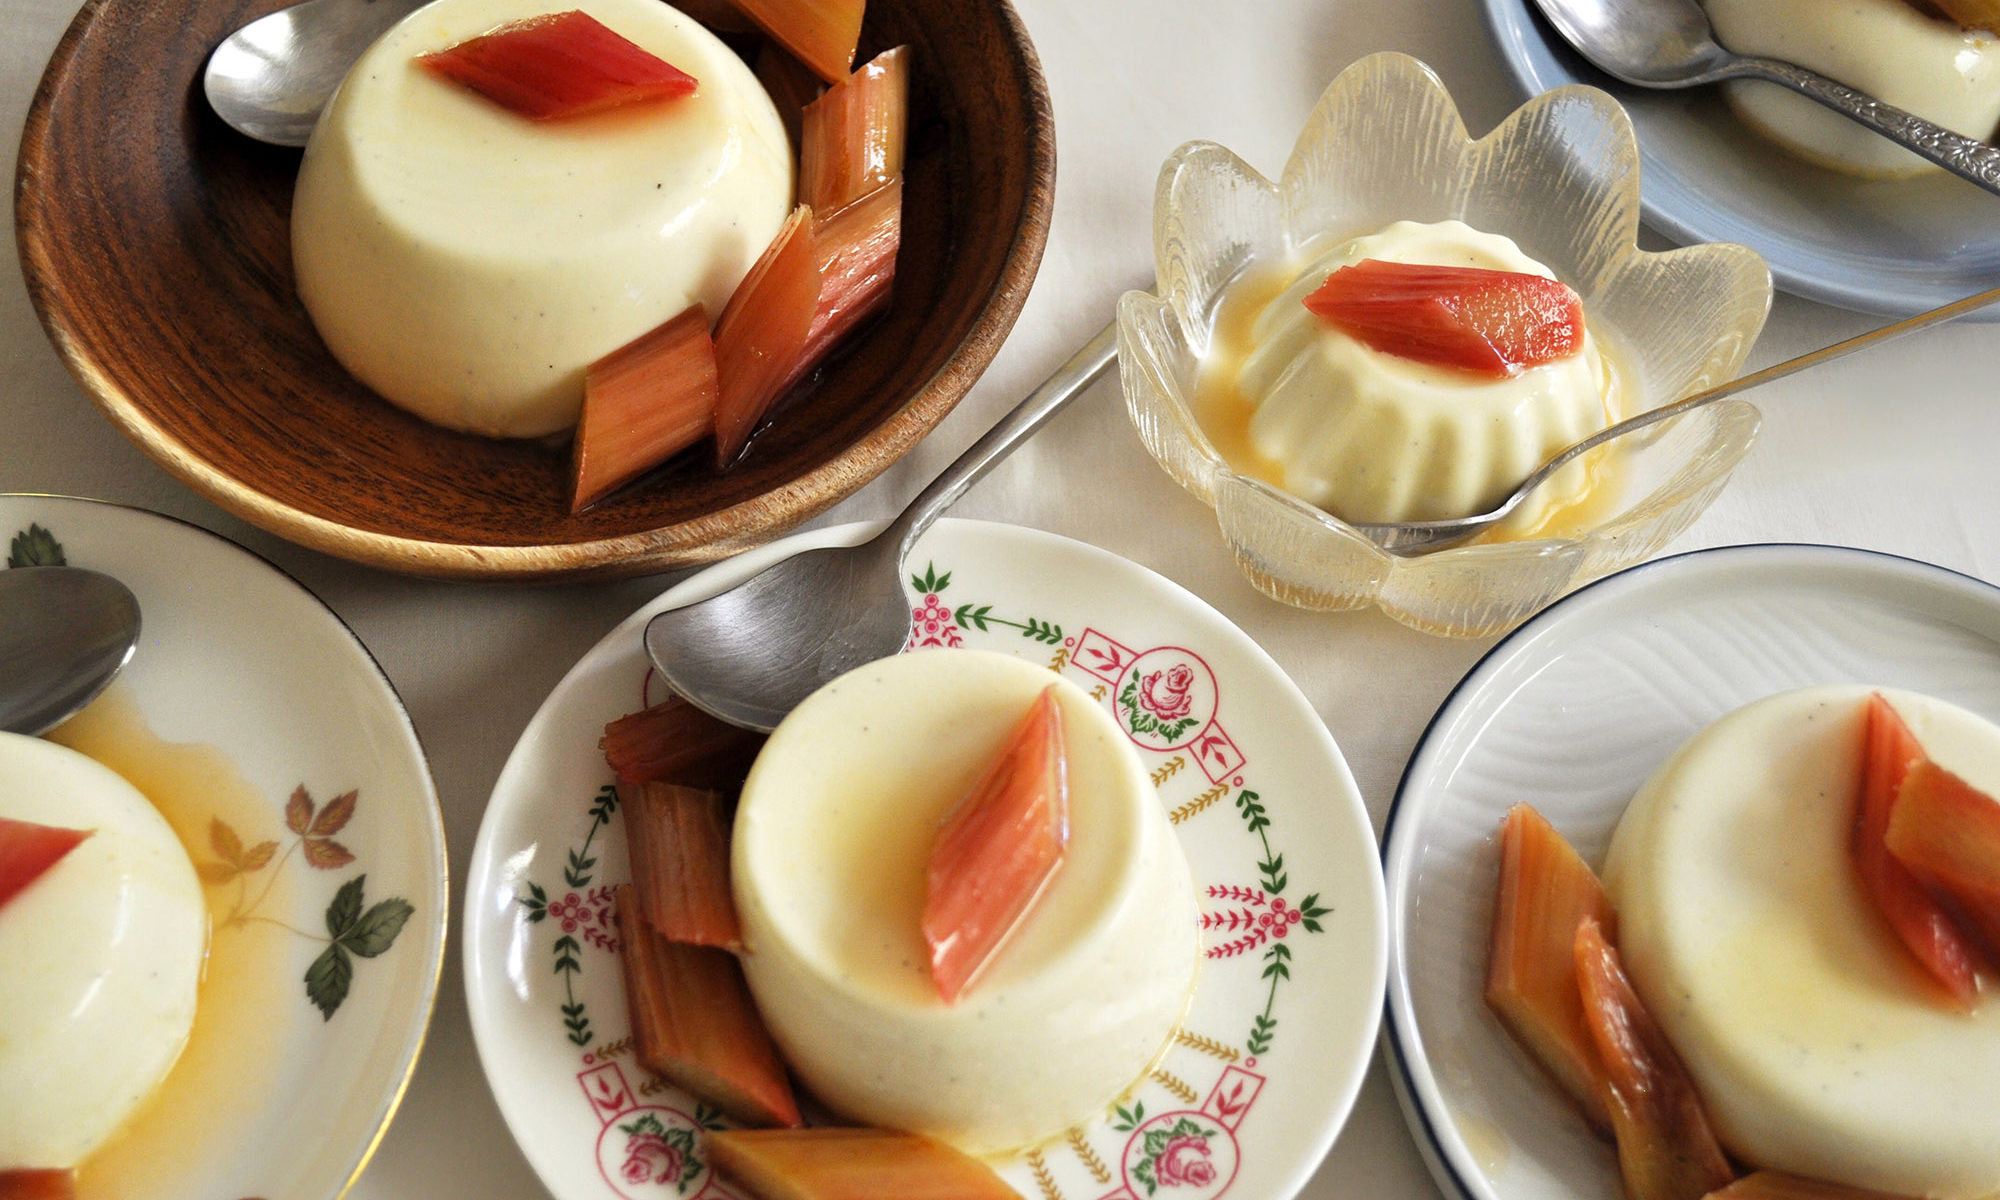
How to make homemade miso recipe
Ingredients:
800g soya beans (organic and GM-free is best)
1kg koji culture (available in Japanese stores or online)
400g salt (I think sea salt is the best choice here since the soya beans are from the soil, it embraces both elements.)
High spirit alcohol like vodka to disinfect the container
Optional: 50g salt and some previously made miso or store-bought miso
Equipment:
Food thermometer
Container(s) that has an airtight lid
Food processor
Paper kitchen towel
Container/ crock (See ‘troubleshoots 101’ below for how to choose the best container)
Cling film or beeswax cling-wrap
Stone Weights
Method:
Step 1: Wash the soybeans (organic, non-GMO is best) in cold water until the water runs clear.
(Note A) The beans are dirtier than it looks. There could be dust or dirt on them. It could take 3 to 5 times of repeat washing and draining to clean it thoroughly.
(Note B) Any bean that floated up during this process are immature beans and maybe hollow inside so remove them. Also, remove other bad beans such as any with dark spots or shrivelled ones.
Step 2: Soak the soybeans in 3 to 4 times water for 18 to 24 hours.
(Note C) Many recipes will say to soak overnight, but I always think that is a little vague, as that could mean anything as short as 8 hours! It’s important to soak the soybeans in water for at least 18 hours and let it become really plump. That’s because if you do:
… it will cook quicker.
… the heat will cook through the whole bean better.
… there won’t be any difference in hardness from bean to bean.
(Note D) Calculate when best to start the process. For example, if you want to cook the soybeans at 10 am in the morning, you should soak the beans at 2 pm on the previous day.
(Note E) The suggested amount of water to soak it with is 3 to 4 times the beans. At this stage, it’s not a problem if the water quantity is not precise. The soybeans expand to 2.5 times to 3 times when soaked, so the three to four times amount of water is enough to ensure that the soybeans are always fully submerged as it cooks.


Step 3: Next, cook the beans until they are very soft; so soft that you can use your thumb and your index finger and squish it to mush without difficulty. There are two ways to cook them: simmering in a standard pot for 4 hours or greatly reduce the cooking time by cooking in a pressure cooker for only 20 minutes. Either way, the procedure is to first drain the beans and then cook them in fresh water.
– The simmering method –
Have ready a pot with a thick base. Add the beans with plenty of new water and simmer on medium to low heat. After a while, you may want to top it up with more water so that the beans are always submerged. Initially, there will be lots of froth that you’ll need to skim. If you happen to have a drop lid, you could boil with minimal heat and water.
– The pressure cooker method –
Pour water to 4 to 5cm higher than the beans. But just make sure you don’t overfill the pot; fill to just over half overall. Boil normally at first, then remove the froth by skimming. Then cook for 20 minutes at high pressure. Depending on your pot size, it might be that you will have to repeat the process several times more if you have lots of beans to cook. I bought my pressure cooker from Amazon…
(Note F) Cooking the beans until very soft is a very important step in miso making that would change the taste and quality of miso. To test whether it has thoroughly cooked, do these three things: – use your thumb and your index finger and squish a bean. See if it mashes without any difficulty. – eat one and see if it still has a crunch. If it is, cook further. – split open a bean and see if it’s white throughout without a dark shaded core.

Step 4: While the beans are cooking, prepare the container or crock by disinfecting the inside of by wiping it with a kitchen towel dampened with alcohol.
Step 5: Once the beans are cooked, reserve about a cup of the cooking liquid and drain the rest.
(Note G) We will use some of the cooking liquid to loosen the miso paste to desired texture in the next step. And if you want to be a domestic Goddess, you can keep the excess liquid too, to use in other dishes! The liquid is sweet flavoured and nutritious.
(Note H) If the colouring of miso is important to you, you could leave the soybeans in the pot for 5 to 6 hours after boiling to deepen its colour.


Step 6: Mash the soybeans really well. You can either use the food processor or wait for the beans to cool “slightly” and putting it in a plastic food bag and mashing it down by squishing it by hand.
(Note I) Do this while the soybeans are still hot. (But just be careful. The freshly cooked soybeans are so hot that it could be dangerous.) There are two reasons for this:
… It becomes difficult to mash when it’s cold.
… The temperature of the mash needs to be preferably 35 degrees centigrade for the koji culture to thrive.
(Note J) Make sure it is really mashed. If the mashing is not thorough, the miso will rot. Keep in mind that fermentation is completely different to rot; the rot is harmful to humans and fermentation is harmless to humans.
Step 7: Before adding in the koji culture, take a temperature reading of the mash. It needs to be LESS than 60 degrees centigrade, preferably around 35 degrees centigrade.
(Note K) When taking the temperature reading, make sure to take it from different areas of the mash, as the centre might be hotter than the outer surface.
(Note L) The koji enzymes die above 60 degrees centigrade.

Step 8: In a large mixing bowl combine the salt and the koji.
(Note M) The size of the mixing bowl should be big enough to accommodate all three ingredients (beans, koji and salt), plus enough room to successfully mix without being worried that it will spill over the sides.

Step 9: Next, mix in the mashed soybeans to the koji/ salt mixture. Thoroughly! Do this either by hand.
Step 10: This is the point when you adjust the thickness of the paste with the reserved cooking water by adding it in teaspoon increments.
(Note N) The thickness of the mixture can be variable from cook to cook because:
… the koji culture you use might soak water differently than others.
… the extent the soybeans have been cooked might differ.
(Note O) The thickness of the paste needs to be firm enough that we can shape it into a ball, yet moist enough that it spreads with ease. A little difficult to explain in words, but it is said that it should be about the softness of your earlobe. Just be aware that too much water would make it easier for it to grow mould though! FYI, I added 50ml to mine.


Step 11: Now the fun part! Make tight tennis ball sized lumps. And then throw it into the bottom of the pot with a splat. Using clean hands, tamp it down. Continue the process of putting it in, each time making sure not to leave any air pockets or gaps.
(Note P) The throwing knocks the air out of the mixture. The less air the better, as it means less chance of mould growth.
(Note Q) At the time of packing, it is important that the temperature of the mixture is below 30°c.
Step 12: Then smooth the top surface to lessen the surface area which will be exposed to air. And If there are any bits of the mixture on the inside walls, wipe it clean with a paper kitchen towel dampened with alcohol.
(Note R) Homemade miso making is all about minimising chances of undesirable mould growth.

Step 13: OPTIONAL (This is an optional step as miso can be made without it. However, it is a step I always take to ensure miso with as little mould.)
Paste some ready-made miso on the top surface, especially around the edges where it is susceptible to mould growth. This will not only inhibit mould but also helps kickstart the fermentation by lending its cultures. In Japanese, we call this ‘tane-miso’, which translates to seed-miso. Just be sure to choose fresh un-pasteurised miso that is alive.
Next, sprinkle some salt on the surface, again especially around the edges. The salt will protect the surface from drying and prevent mould generation. However be aware that you’re making the miso saltier when you do this, so be sparing/ frugal with the amount!
(Note S) There are people who also disinfect the miso surface by spraying alcohol, cover the surface with ‘sakekasu’, (the solids, or lees, that remain after making Japanese sake), ‘amazake’ (Japanese drink made from fermented rice), or dried kombu seaweed.

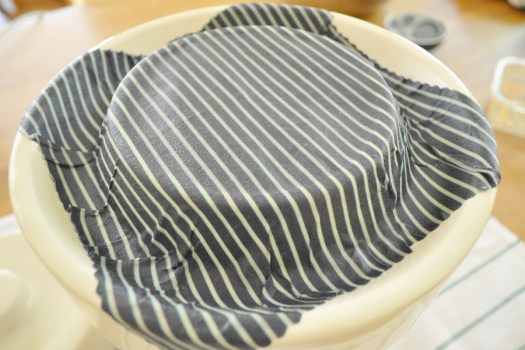
Step 14: Next, we cover the top surface with either cling film or food-safe plastic sheet. FYI, for this purpose, I used a beeswax cling wrap to be plastic-free. Either way, be thorough with covering all around the edges, which is prone to air exposure and getting mould.

Step 15: Weigh it down. You could use a weighing stone as I did, or a plastic food bag filled with salt or cooking beans. It should be double-bagged lest it should leak. Anything will do, so long as it is water-proof or food-grade material, so long as it applies pressure equally on the flat surface.
(Note U) The weight should be in the region of 10 to 30% of the weight of the miso.
If it is too heavy the liquid tamari will ooze out too much. But if too light, there won’t be enough liquid tamari, which will also be bad, as adequate liquid tamari on the surface protects the miso from the mould.
(Note V) We weigh the miso down to deflate the miso and equalize the quality. As the fermentation proceeds, the yeast produces carbon dioxide so it is used as a weight to let it escape.
Step 16: Cover the pot with several layers of newspaper tied tightly to the pot to protect it from dust or any insects. And don’t forget to label it with the date it is made.
(Note W) In my case, I used a beeswax cling wrap to seal the pot (it is wonderfully sticky!), then put the pot lid on top.

Step 17: Storing time! Store it somewhere cool. Somewhere with temperatures of 15 to 20 degree centigrade is good. If you’re storing it in a cupboard, just open the door sometimes to change the air.
(Note X) I read a suggestion to not put the pot directly on the shelf, but put a brick or some sort of raiser underneath first, presumably so that air can flow underneath the pot too. I never bothered.
Step 18: SIX MONTHS LATER: Time to do what’s called Tenchi-gaeshi (天地返し) in Japanese. It’s to stir the miso that has been fermenting in order to ensure uniform ripening during the process of producing the miso. It also promotes the fermentative action.
To do that, we take out the miso, and put it back in.
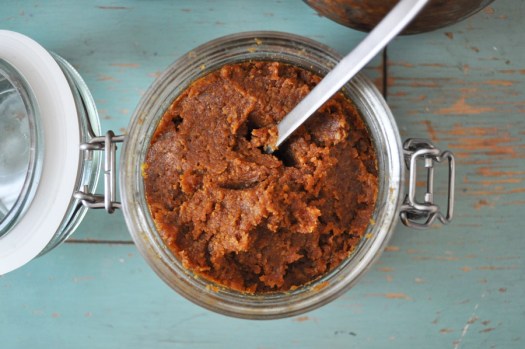
So first, carefully open the lid, take the weight out, and then peel off the covering. How does it look? No huge problem if you see the top surface not looking great. It could be either dry or wet or slimy, even with mould growing. If that’s the case, discard this surface by careful scraping. And disinfect the mouldy sidewalls with a bit of alcohol. Underneath, you’ll see the lovely miso paste. Here, you might also see a liquid called tamari. This is liquid that’s been pushed out by the heavyweight, and it acts as a barrier to the miso from the air and stops the mould from developing. It’s full of umami flavours so don’t discard this, just mix it back to the paste.
Next, take out all of the miso into a separate bowl (pre-disinfected with alcohol). Take this opportunity to clean out any more mouldy parts in your container. Once that’s done, firmly and tightly put the miso back again, being careful not to introduce any air pockets,
cover it up again just like before (minus the extra salt and miso paste on the top surface).
(Note Y) Miso starts to ferment from the top surface where it is nearer to the air. So to evenly ferment, it’s best to take the miso out once and put it back in to swap the bottom to the top.
(Note Z) Don’t forget to taste test while you’re at it! At this stage, the miso is actually good enough to be eaten already.
Step 19: ANOTHER SIX MONTHS LATER: It has finally finished fermenting, so this is the timing to stop the ferment and refrigerate!
Carefully remove the lid, the weights and the clingfilm/ beeswax wrap. Remove any mould or dry surface. Here, make sure that you clean off any mould on the inside walls, as you don’t want it to touch the miso during taking out the miso paste.
Then take the miso paste out of the container into pre-disinfected fridge-container(s). This could be a glass jar or a tupperware so long as it has a tight-fitting lid. Pat the paste flat.
It is said that the quality of the resulting miso is endlessly different, and it will never be possible to make the same quality again. Taste changes due to slight changes in climate and differences in care. Which serves to remind us that there is no such thing as ‘the best’ in life, and to that end, it will be necessary to get used to be content with the ’now’ and enjoy the homemade miso.
Q1: What type of miso is this?
A: This would be classed as unpasteurized miso called Nama-miso (Nama means raw or fresh in Japanese). Commercially available miso is pasteurized / heat-treated during the manufacturing process.
* * * *
Q2: What type of container should I make the miso in?
A: There are five materials to choose from. In all cases, make sure you have a wide-mouthed container with straight sides so it’s easier to put the miso in and out.
- – Plastic tupperware: Many people in Japan use plastic containers to make miso in, perhaps because you can get huge ones to ferment a lot in one go. Plastic is also cheap and light to carry, which is a huge advantage.
- – Enamelled pots: It comes in all sorts of shapes, sizes and colours so it can look pretty in your kitchen. Cheap to buy, and light to carry around, the beauty of these is that the colour and the odour of miso won’t stick to the surface. It is also strong to withstand salt. But, once damaged, it will start to rust from that area. Find one that is seamless with no joints.
- – Wooden buckets: Traditional. The faint wood aroma will transfer on to the miso. And the more you use it, the more good bacteria will live on it. The bucket ages well by darkening, but might deform/ shrink/ expand with moisture, and so it is quite difficult to look after, so I would consider this as an expert level choice. If this is your first time making miso, maybe this is too much of a complicated layer to think about, and so I wouldn’t advise on using this. If you are, make sure you purchase one suitable for food contact. Consideration should also be made on the water content of your paste, as the wood would soak some away, making your miso unpredictably thicker.
- – Glass jars: The beauty of using glass is that you can see inside, so it’s fun to look at, and you can keep an eye out to see how the miso is doing without having to open the lid, exposing it to air. You’d be able to spot any abnormality quickly and will be able to resolve. But glass is heavy and it can break. Also, light can penetrate through it and dis-colour the miso. So, make sure to either cover it up or keep in a dark place.
- – Ceramic pottery: Less likely to be affected by outside light and temperature. And the container never deforms so you can use it forever. But it is heavy to carry, can break, and can be expensive. But, treated well, it will last a long while. For my miso pot, I use a German fermenting crock that I bought on Amazon.
Q3: There is mould growing! Help!
A: No worries. Mould is common-fare for homemade miso. If it’s a transparent film covering the surface of the miso it is not moulded but the yeast. And if it’s the fluffy kind, maybe in white, black or blue, get a disinfected spoon, scoop/ scrape it out and discard. Just remember to flatten the scooped out surface again afterwards. And replace the clingfilm/ beeswax wrap cover on the surface of the miso with a clean one.
Q4: Why did mould grow on my miso?
A: Since we didn’t use artificial preservatives, it is normal for mould to grow. When making homemade miso you have to minimise the chances of undesirable mould growth. Mould grows because of undesirable bacteria, or simply exposure to air. So, for that, you have to work clean – disinfected hands and equipment and containers. And what you want to be aware of is hold the urge to frequency opening and closing the lid for a peek. If you open the lid frequently because you are concerned about mould growth, you’re actually doing it a disservice, as air will go in and the miso will become more likely to grow mould. So don’t become too nervous about it – it’s enough to remove mould once in the making-process.
Q5: I’m worried about the smell. It’s like alcohol.
A: It is the smell of the fermentation ripening, and there is no need to worry about it, it won’t affect the taste.
Q6: Why didn’t it ferment properly!?
A: There is a possibility that the culture that promotes fermentation may have been killed. It dies when the temperature becomes 60 degrees or more. Perhaps you mixed the koji culture with soybeans that were too hot. Or maybe there was unevenness due to not mixing well. Also, the koji culture itself might have been ineffective in the first place.
Q7: Can I adjust the amount of salt or any other ingredient?
A: Once you’ve experienced making miso for the first time, you can consider whether the salt amount is good for you or not. Everyone has a different idea of how much salt is delicious. Just remember though, salt acts as a preservative so don’t go changing the amount drastically. Less salt could also make it ferment faster, and more salt would make the fermentation slower. And less salt could sour the taste of the miso. You can also play around with the amount of koji. If you prefer the miso to be sweeter, you can add more koji, and if you prefer saltier, put less koji.
Q8: Is there a shelf life for homemade miso?
A: No, but try to use it up in a year and eat it while it’s fresh. The cultures are actively alive in the homemade miso, so refrigerate it in a tightly lidded container.
Q9: When is the most suitable season for making homemade miso?
A: You can prepare miso at any time of the year. However, the cold season from October to April is said to be the season that is generally suitable for miso preparation. Because in the summer, both temperature and humidity are so high that there are more bacteria in the air and that may cause abnormal fermentation. Making it in the cold season also allows the ferment to happen slowly. But that is in Japan where it’s properly hot in the summer and cold in the winter, compared to where I am, here in the UK, where summer is never hot, and always cold in winter. Apparently, the ideal temperature to keep the miso is 27 degrees centigrade, but I don’t think mine was ever that warm.
Happy homemade miso making! ^^

Hope you’re doing well, Tatami-san! What a wonderful guide to miso making – so thorough and straightforward! I can imagine how nutty and aromatic your homemade miso must be! I’ve been fascinated by this process, especially in NHK’s shokunin-focused programs. There was a particularly nice episode of Venetia at Home in Kyoto, where she makes a batch with one of her neighbors.
I always appreciate your thoughtful posts. Sending my best wishes to you and your family.
Yoshiko san! Ohisashiburi desu! xx It’s great to hear from you! We’re all doing well, thank you. The miso is a huge hit with my family and it’s going down so quick…, lol, I need to make a new batch, but the koji is quite expensive here in UK because it’s imported. – Yoshiko san, I hope you and your loved ones are also doing well! T xx
Hello, many thanks for sharing your experience. I am at a point where I need to tenchi-gaeshi. First of all there is an amount of salt sprinkled on top during the first packing. Would you recommend scraping the salt off before tenchi-gaeshi? Also, should we sprinkle salt again after the first and second tenchi-gaeshi?
Hello! Thank you for your message!! 🙂
When doing tenchi-gaeshi, you don’t need to remove the salt sprinkled on top—you can simply mix it in (unless you’ve put an excessive amount in the first place!). It will blend into the rest of the miso during the turnover.
However, if you notice mould on the surface, please remove the mouldy parts completely—including any salt in that area—before mixing. And if the salt has clearly hardened or crystallised, it’s best to break it up gently and mix it in evenly so it doesn’t clump in one area.
After the turnover, lightly sprinkling more salt on the surface is optional, but it can help prevent future mould, especially in warm or humid conditions.
Wishing you great success with your miso-making! Let me know how you got on 6 months from now!
Hello Tamami, not sure if you still keep up with this, my name is Marta and I’m originally from Italy but have been living in London for almost 10 years now. As luck would have it, not very far fromBroadway Market where you once traded from! I was reminded of you and your INCREDIBLE brownie recipe from a while back when researching baked goods to prepare on Friday mornings to make my kids get up from bed more swiftly XD I remember I used to prepare those for my colleagues back in Italy, almost 20 years ago now (!!) and they were enthusiastically received. I even got a marriage proposal because of them haha! I found out today that Coco and Me is no more, but luckily some other bloggers had saved *that* recipe so I’ll be trying it next Friday and I already know it will be a hit. I just wanted to reach out and thank you for it. Hugs and all the best!
Dear Marta,
What a beautiful surprise to hear from you! Thank you from the bottom of my heart for taking the time to write to me.
And wow — how amazing, awesome, and heartwarming that my brownie recipe has been such a hit! A marriage proposal?! Did you end up getting together with the guy? I need to know! 😉
Now and again, I still receive messages from blog readers and market stall customers — even after quitting it nine years ago — and every single time, I feel blessed that people remember me. Those cake-making years were truly special.
So you live near the market now? I’m sure you’re loving it there! 🙂
Tamami xx
Ah, what a joy to read your reply! No, I didn’t marry the brownie-struck colleague haha ended up with a likeminded full time foodie 😀
Yes, we’ve been in Dalston for 8 years now and we know this area has changed a lot from its heyday, but it’s still brilliant in so many ways. Broadway Market is positively chaotic at the weekends haha but still loads of yummy finds there. And when the weather is lovely and summery, it’s even better! A stroll around London Fields, maybe a swim at the Lido, a little jog on the canal..so many options!
Damn, about that brownie—if you two had ended up getting married, it could’ve been one of those epic stories to tell the grandkids one day! LOL.
By the way, reading your message really made me miss Broadway Market… I actually haven’t been back since I stopped running my stall there. I live in North London, so it’s not far at all physically—but emotionally, it’s a different story. I really loved being there and meeting amazing people, and going back now would just remind me that I’m not part of it anymore. It’d honestly make me a bit sad!!!! Anyways, enjoy the sunshine!!! I bet London Fields is buzzing! 🧺😎👍☀️
Hi again Tamami, It´s summer time here in Europe and we get heatwaves. I was wondering if I should be bringing my miso-s down to the cellar. The coloring is now darker, I suspect due to the increase in temperature and am uncertain whether this is how it should be, letting the miso grow with the changing seasons.
Hi again!
This is a great question, and you’re right to be paying attention to temperature during these summer heatwaves. Miso fermentation is a living, microbially driven process — and temperature has a big impact on how it develops.
At temperatures above 30°C, several important things happen:
1. Maillard Reaction (Browning)
The darkening you’re seeing is likely due to the Maillard reaction, a non-enzymatic browning process where sugars and amino acids interact under heat. While this is normal and even desirable to some degree (especially in darker miso styles), it can advance too rapidly in high heat, leading to a sharp, overly matured flavor, and possibly unbalanced saltiness or bitterness.
2. Overactive Fermentation
High heat accelerates the work of koji enzymes and fermenting microbes, which can disrupt the balance of flavor. Fast fermentation may sound appealing, but it often results in:
Off flavors (overly sour, overly salty, or bitter)
Loss of subtlety in umami development
Increased moisture on the surface, which can encourage spoilage
3. Spoilage and Safety Risks
The most serious concern is the increased risk of spoilage or contamination:
Beneficial organisms like Aspergillus oryzae (koji mold) and lactic acid bacteria can be weakened or outcompeted.
Opportunistic bacteria, unwanted yeasts, or harmful molds (especially dark green or black types) may grow.
In worst cases, fermentation can fail entirely, and the miso may become unsafe to consume.
What to Do
If your cellar stays below 25°C, it’s the perfect place to move your miso — it slows fermentation down to a healthier pace and keeps the microbes in a more stable, predictable environment.
Also, make sure your miso is covered and weighted well, with minimal air exposure, and that the container is clean and breathable to prevent anaerobic spoilage.
Let me know how your batch evolves — I’d love to hear how the flavor develops over time!
Warm wishes,
Tamami
Hi Tamami,
Many thanks for your usual prompt response. Will do as advised and I wish you well.
Kind regards, Eve